Happy Birthday To Me!

It may be late on ‘update day’ but I won’t let you down! It was my birthday earlier this week, and Josh took me to London for the weekend to see a show (of my choice) as part of my present. It was absolutely wonderful, I’m exhausted and my voice is disappearing, but I want to at least share with you the making of my birthday cake.

I did make my own birthday cake, partly because I knew exactly what I wanted, and because you can’t find cakes like these in Luxembourg. I decided to make a red velvet cake, covered in large buttercream swirl roses.

IMG_1736

Basically, a red velvet cake is a buttermilk layer cake with some cocoa powder added into the flour, and red food coloring. It’s not really a chocolate cake as the chocolate taste is quite faint, but it complements the rest of the flavors nicely.

The Joy Of Cooking recommended that the cake be iced with cream cheese frosting, but in my experience, cream cheese frosting does not hold up well when piping designs. So I decided to make a batch of vanilla buttercream instead (I am the birthday girl after all, and it’s my cake 🙂 )

IMG_1737     IMG_1738

Then I re-watched this Youtube video, which explains in a clear, visual way how to make buttercream swirl roses. I think I need to invest in some smaller diameter cake pans in order to make a cake similar to that in the video- I would love to have a taller slimmer cake than my usual 9″ diameter round ones.

IMG_1740

So I made my white roses and ran into a disaster: I ran out of icing. And I had no butter left to make another batch. Luckily, I do have a ton of vegetable shortening, and I have a good, quick recipe to make a shortening-based vanilla icing. But, since shortening is very white, and butter is not, I had to add some food coloring to the second batch.

IMG_1741

I went with purple, of course. My favorite 🙂

Luckily, I’d had just enough white icing to make a white center rose before completely running out, so the final effect was very pretty.

IMG_1748

Close-ups of the roses:

IMG_1746    IMG_1749

And the final effect, with the red, red cake on the inside ^_^

IMG_1750

Thanks for stopping by!
Fruity Muffins

I’ve surprised myself a bit with this post, although it is late already, and I’m not sure how much it’s worth. I’ve been sick the last few days, so my motivation to bake (or do anything for that matter) has been pretty low. But I had these kaki/persimmon fruit in my fruit bowl and they were looking pretty ripe, so I pulled out my Cupcake recipe book and had a look at what Gail Wagman had to offer.

IMG_1719

While her recipe originally includes nuts, I omitted these because 1) I’m not a fan of nuts in cakes, and 2) I had no nuts in the apartment.

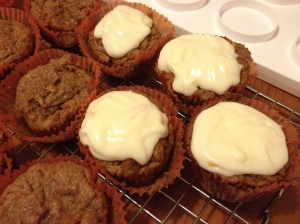
The cupcakes turned out quite good, moist and mostly tasting of the cinnamon and ginger spices that went into the mix, rather than the kaki fruit. My hunch is that the fruit was actually too ripe to do anything with, but I thought I’d give it a try before putting it all in the bin. So the cupcakes are yummy, and I mixed up the frosting to go with it: orange cream cheese.

IMG_1721

It looked fine, and I chilled it for the required 1 hour, but everything went downhill after that. As I scooped it into my piping bag (I thought I’d make some pretty swirls, as I’ve got a swirly cake planned for later next week), it started dripping out the bottom. Clearly, the icing was the wrong consistency. I tried to swirl it on to some of the cupcakes anyways, but it just dissolved into a generic blob.

IMG_1720

So I shall keep my cupcakes nude, and therefore rename them muffins. I don’t doubt they’ll disappear quickly, as they’re good enough to eat for breakfast!

I will be back on form with a proper cake next weekend, as it’s my birthday on Thursday, and I’ve been dying to bake a red velvet cake (for any occasion). So there, you have a sneak idea of what’s coming next!

Thanks for stopping by, and see you next week for a more exciting cake!

Happy Halloween!

Okay, okay… so Halloween was three days ago. Problem is, I like my scheduled Sunday updates, and I guess that means that if there’s a holiday involved, its related post is going to get delayed by a few days.

Besides, the only really exciting thing here is that I baked super cute Halloween cookies for our Halloween party.

We had some guests over for the week of the holidays, so baking these cookies took about three times the time it should have. My friend Jenna had given me a neat cookie making and decorating book for my birthday last year, with lots of recipes and techniques for using royal icing (of normal consistency and liquid consistency). My brother Keenan also sent me a link a few weeks ago to SugarBelle‘s website, which has a bunch of easy-to-follow cookie decorating tips.

So I was all set.

IMG_1555    IMG_1557

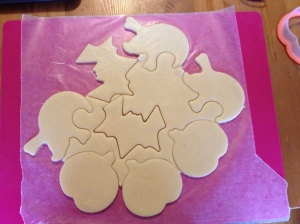
I used my brand-new Halloween cookie cutters that I got from The Craft Company, and got lots of cookies out of the recipe. I just made a basic vanilla cookie, as that would suit everyone’s tastes.

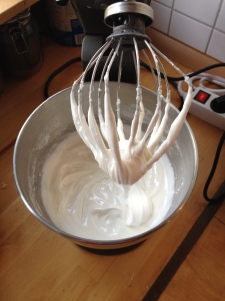
After the cookies cooled, I mixed up the royal icing.

IMG_1558

I had A LOT which was good, because I was going to need several colors. That being said, I still have some plain white left over, even after making a second batch of cookies and decorating those. I read the instructions about royal icing both on SugarBelle’s website (Outlining and Filling Cookies) and in the recipe book, and starting icing the outlines. I started with the ghosts, because there was no color to add to the icing, so I figured they were the easiest to start with.

IMG_1560

They were quite easy and I was really pleased with myself.

IMG_1589   IMG_1702   IMG_1679

I also made bats and cats – although getting the black really black for the cat was tough, and I actually ran out, so some of my cats just had outlines. My bats looked pretty cool with outlines and accents too.

I was most pleased with how the pumpkins turned out though.

IMG_1562   IMG_1588

Using royal icing was both tricky and simple. Simple, because there was no fancy opening or tip in the piping bag; I just sniped a tiny piece off at the end, and that was all I needed. The tricky part was diluting the icing to flooding consistency. Beginner’s luck allowed me to get the ghosts’ just right, but I added too much water to the black and purple, which meant they took much longer to dry. As it was, they were taking several hours.

I was pleasantly surprised that, despite the cookies laying out for the icing to dry for hours on end, they didn’t actually go stale at all. Some of these cookies are nearly a week old now, and still taste just as fresh.

IMG_1667

I found that decorating these cookies gave me a similar sense of satisfaction as decorating a cake. Of course, a cake is a one-off piece, with lots of smaller decorations coming together, whereas these cookies were four designs repeated many times over.

I had lots of fun, and I look forward to using different cookie recipes, and using my next set of holiday cookie cutters… Christmas is just around the corner!

Thanks for reading!