Drum Roll Please!

This fabulous cake was for a friend and colleague of mine who has taught at my school for about as long as I can remember. He taught 3rd grade when I was in 3rd grade (although I wasn’t in his class), and was a dear friend of my mother’s. This year, he retired, and I was overjoyed that his wife asked me to make a cake for his retirement party.

His main interests (apart from teaching) being playing the drums (he’s a musician as well), art, and swimming, we decided to creatively represent all three of these.

I baked a combination of vanilla and chocolate cakes, and to add a bit of excitement, placed a chocolate layer in the vanilla cake. This was the bottom tier, and largest drum.

IMG_3401

The second, smaller drum, was entirely chocolate, and the ‘skin’ cover of the drum was blue, to represent a swimming pool.

IMG_3402

Making the metal fixings of the drums was tricky, but proved to be quite an important learning step for me. This was the first time I’d done anything like it, and getting to fondant around in one piece was difficult. I had to do it in two pieces for the largest drum, as using one one length kept tearing.

IMG_3405

Once I got it stuck on and let it set for a few minutes, I painted over the grey fondant with metallic silver food paint.

IMG_3413

I had one thin layer of chocolate cake leftover, and rather than throwing it away (I hate wasting, and I was out of space in my freezer to freeze it), I made a thin tambourine to sit on top. This was a total extra, but I thought it’d be nice to emphasize Robert’s passion for art by also including an artists’ palette; instead of just having drumstick paintbrushes.

IMG_3414

This part was a bit last-minute, and not as secure as I would have liked it to be, however the overall effect was striking.

IMG_3415

Everything (except dowel rods) is edible in the cake, including the drumstick paintbrushes which are made of fondant.

Happy Retirement!

You’re Never Too Old For An Animal Party

This epic cake was for a young lady who turned 18. Her party’s theme was ‘animals’ and she herself was going as a unicorn, which I applaud because you should never ever lose your silly side just because you grow up.

So I searched for animal cakes, and found one that served as my basic inspiration. Given more prep time, I would have ordered more specific fondant and created better decorations and figurines, but given the resources that I had, I think it turned out OK.

I decided on a three tiered cake. If you are a baker and ever find yourself having to bake a cake for a large number of people (50 in this case) and no idea how much cake you actually need, I highly recommend signing up to this website: www.bakingit.com. It’s free, so long as you’re using it on a computer, and it will basically design your cake for you, once you put in your specifications (shape, number of portions, etc).

The largest tier was a marbled vanilla-chocolate cake, with fresh strawberry icing. This icing is DIVINE.

IMG_3294

I covered it in white fondant, and decorated with strips of black to emulate a zebra’s hide.

IMG_3298

The middle tier was a chocolate mudcake, or as my father calls it, brownie cake. Given its’ richness, I decided to simply cover it with dark chocolate ganache, as a tree trunk.

IMG_3299

I punched out lots of leaves both in dark green and bright green fondant, and lined the top of the middle tier. I used three different sizes, first the big ones, then I used middle sized to fill in the gaps.

Once I placed the final tier on top, I used the tiny sized leaves to hide the edge. The final tier was all vanilla, and decorated to look like a giraffe’s skin.

IMG_3300

And lastly, I did make a small elephant and panther head, because after all, it wouldn’t be much of an animal cake if only two animals were represented. I found this handy tutorial to teach me how to make an elephant; the panther came straight from my imagination ^_^

IMG_3301

I had a blast making this cake, even if it did stress me out, I had bad luck finding the right gluten-free flour, and I was up at all hours of the night putting it together. But the look on Lucie’s face when I delivered the cake was definitely worth it.

Happy Birthday!

First Communion: FC Porto

This is the second First Communion cake I made, coincidentally for the same weekend as the football pitch. The request here, was to create a cake using the FC Porto logo as inspiration, as that is the boy’s favourite football team. Of course, the logo had to be rather complex:

FCPorto

Since the cake was for around 20 people, I decided to use the round blue part as the main cake base, and supplement it with a half football in order for there to be enough cake for everyone. For the crest, I ordered some wafer card and used edible ink markers to draw it.

IMG_3257

The cake itself was vanilla, with vanilla icing. I used blue icing between the layers to keep in with the FC Porto theme.

IMG_3256

IMG_3259

Then, I baked a half sphere cake in my handy Wilton’s Sports Ball pan (such a lifesaver for these things!) and fixed it towards the back of the cake with some icing. I also cut it in half to add some icing in it – makes it look prettier, and I feel that the icing helps break up the cake texture a bit.

IMG_3260

The next morning, I got to tessellate again, which I was very excited about. This time, I actually ordered a cookie cutter set specifically made to cut fondant to cover a football cake. They worked a treat!

IMG_3261

The crowning piece was affixing the wafer card to the front of the football. I used some extra icing to attach it at the back, as I was worried that using edible glue would affect the wafer and the ink.

IMG_3263

Ta-da!

Congratulations Patrick!

Birthday Boardgame Bonanza

Hello everyone!

Apologies for my absence. Things got very very busy and it was hard to find time to sit down and write a proper post. Of course, that means there is a lot to catch up on! So without further ado…

I made three cakes for Zak’s Boardgames Birthday Bonanza. The lesson I learned? How to appropriately size cakes for a given number of people. There was WAY TOO MUCH cake (wait, is that even possible?).

Given his recent foray into Minecraft, the first cake I decided to make him was a cake that looks the way cake does in Minecraft.

IMG_2670

This was a chocolate cake with chocolate buttercream icing. I genuinely looked up a picture of a Minecraft cake in Google so I could place the red sprinkles accurately. This was a relatively simple cake, although cutting and placing the white fondant was tricky. It was fun, although some people at the party were confused about it.

I also made Minecraft cake pops: chocolate of course, and made to look like blocks of dirt or with mine-able materials.

IMG_2657

The second cake I made, was of Zak’s favorite boardgame of all time: Pictionary.

IMG_2669

This one was purely vanilla: cake and buttercream icing. Again, a simple design, covered in fondant. I got to use my brand-new writing tips to pipe the white outlines and words. While you can’t tell in this picture, my writing is still a bit wobbly. To help make the lines straight, I used a piping lace decorating tip from SweetSugarBelle “Piping Lace on Cookies” (A side note: I’m really excited to try piping lace too!).

Also, the reason the colors are a bit off on the board, it’s because it’s hard to cut a rectangular board into five equal areas, and I had very little orange/purple-blue fondant to work with. Covering the cake boards was a rather last-minute idea.

The final cake I made, was based on the Settlers of Catan. I ordered a hexagon-shaped cake pan and had to make four times my regular vanilla cake recipe. I put chocolate buttercream between the layers. I covered the whole thing in fondant, hexagons the exact size of the game pieces. I made my own Robber. I even made dice! I’m pretty darned proud of this cake.

IMG_2671  IMG_2672

To help with the placing of the resources, I generated a game on my iPad version, for complete authenticity. Although the cake isn’t big enough to show the full game, the resources are placed randomly, as are the numbers.

So, three cakes, when really, the Catan cake would have fed us all.

IMG_2675

So the birthday boy was very happy, and I was pleased to pull this off, even if I do need to seriously reconsider cake quantities etc.

IMG_2678

Thanks for reading!

Jo

PS. I know this post isn’t as detailed as to the making-of for each cake, but I thought it would simply be too long, and I didn’t like the idea of splitting it into three posts. Suffice to say there was a lot of work involved but I’m pleased with how they all turned out ^_^


Pink & Purple Ombre

This will just be a short post, and nowhere near as elaborate as my last one, but I want to share this cake with you anyway. It brought me to tears, despite its’ simplicity.

I made a pink and purple ombre cake for my colleague’s birthday this week, right after my mountain cake. I drew inspiration from Glorious Treats’ Purple Ombre Mini Cakes, and figured it would be an easy and simple cake that would still look pretty.

And it mostly was! I doubled my easy vanilla cake recipe and split it first in half. That was my first mistake: I eyeballed instead of measured. With each half, I then dyed it with the lighter colour first, and then the darker. Overall, my colours were just fine… but the heights of my cakes definitely were not.

IMG_2390

I admit: I cried a bit. I had a mountain of stress, a huge cake I’d finished the day before, and now this simple cake reduced me to tears. But, I still put it together, because honestly, what else was I going to do?

It actually turned out OK.

IMG_2392

Unfortunately, the skinniest layer was supposed to be the second, so the ombre effect was a bit off, but the cake overall looked good.

I covered it with simple vanilla buttercream roses.

IMG_2393

And the cut slice still looked pretty cool ^_^

IMG_2399

But for next time, lesson learned: Don’t double from the start, and measure accurately when separating the batter.

PS. Apologies for the darkness in the photos. I don’t have very good photo lighting in the apartment, and it was dark outside.

Happy Friday Rainbows!

Hi everyone!

At the school I work at, we like to celebrate birthdays. So much that we have a volunteer teacher in charge of organizing something called Birthday Break once a month, to celebrate that months’ staff birthdays. It takes place during the morning break time, and about seven to ten staff members are asked to bring in a savoury or sweet treat to share (obviously, these are not the same staff members whose birthdays we are celebrating – that would just be mean).

A few weeks back, I came across a photo of a great rainbow cake, and I’ve been dying to try it out. I opted to not put the candy filling in, because it would have been too messy to cut otherwise. So when I saw I was on September’s list of preparers for Birthday Break, I decided that the cheeriest cake to make would be this one.

I started by making a batch of my favourite vanilla cake (The Hurry Up Cake) and a half-batch of classic vanilla buttercream frosting.

Image

I then cut each one in half, and stacked them. When I tried to stand them on the flat end of the semi-circle, I ran into a problem – the two outer layers were falling off! The icing was too soft to keep them together, so I stuck the whole cake in the freezer for about five minutes, to solidify the icing.

IMG_1369      IMG_1371

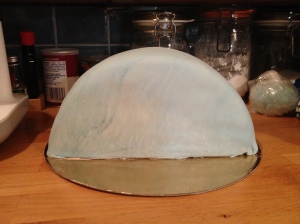
I was then able to set it on it’s side and cover it in the remaining icing. Satisfied with the crumb-coat and shape, I decided I had time for one attempt at making my own marshmallow fondant again. I had found a different recipe online that seemed promising and not too complicated. My dad was bringing me store-bought fondant the next day anyway, just in case this ended up not working.

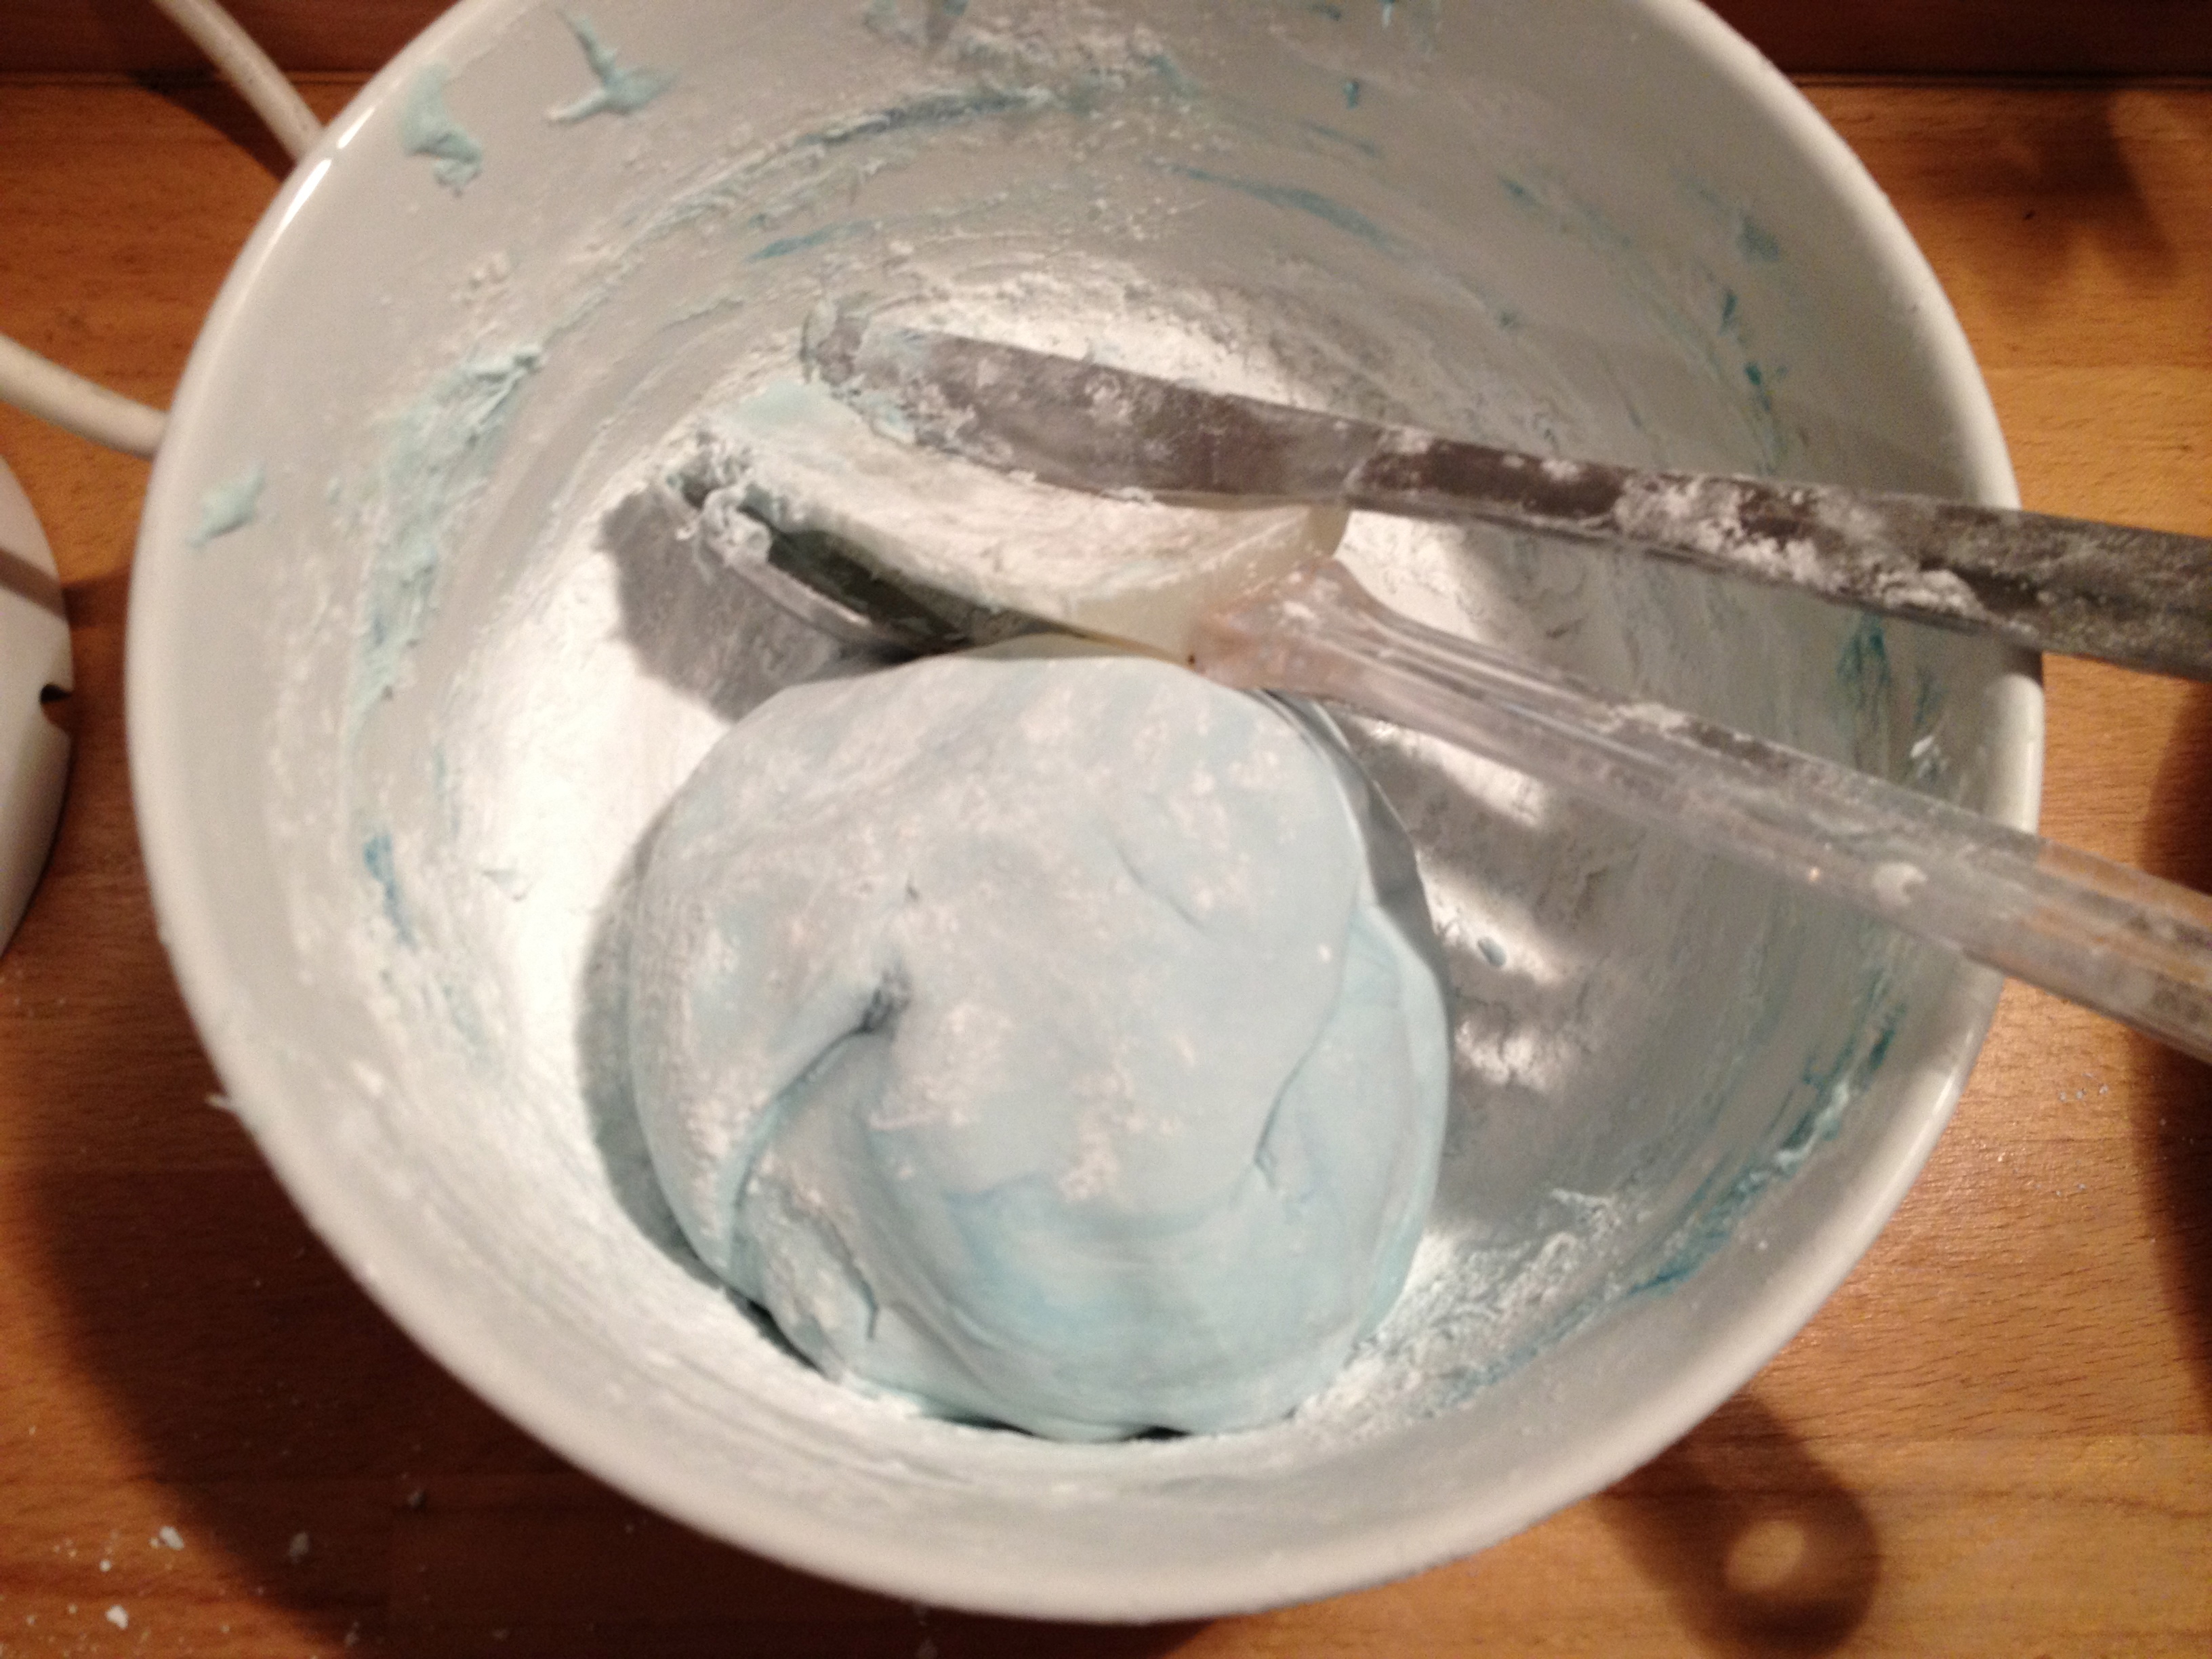
So I made the fondant, and coloured it pale blue for the sky:

IMG_1370     IMG_1372

This fondant was really easy to work with, elastic but didn’t tear, and comfortable. I think I will be using this recipe in the future (I just need to get lots of mini-marshmallows!) I prefer marshmallow fondant to store-bought mostly for the taste. Store-bought has a kind of “fake” sugary taste, whereas marshmallow fondant has more flavour.

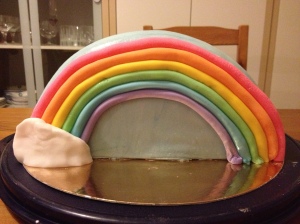
After covering the cake, I sat and made six smaller balls of coloured fondant: pink, orange, yellow, green, blue, and purple. The pink was meant to be red, but after adding alarming levels of red gel colouring and the fondant only getting a brighter pink, I decided to leave it at that. Besides, real rainbows in the sky don’t have a vibrant red, they’re more pinkish.

IMG_1375

I rolled the fondant into long snakes, and applied them using my recently-bought edible glue. It works really well, much better than water would. After getting all parts of the rainbow on, I made some clouds out of white fondant both to hide the messy edges of the cake and the rainbow, as well as to tie it all together.

IMG_1376    IMG_1380

Then my wildly overactive mind suggested I make rainbow cupcakes as well, because there are a lot of people on the staff, and maybe the cake won’t be enough for everyone. I used the same recipe for the cupcakes, but my original idea has been to use that ‘rainbow’ stripy candy instead of making the rainbow out of fondant. This would have been great had I actually been able to find that candy. So the cupcakes ended up being miniature versions of the cake.

IMG_1381   IMG_1383   IMG_1384

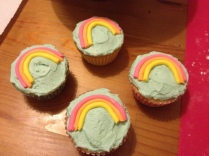
It was a lot of fun making these, and I was really pleased with how the cake and the cupcakes turned out.

IMG_1391

The only slight problem with the cake was that it was dryer and more crumbly than usual. I think this was because of it’s five minute stint in the freezer, so I will need to look into preserving moistness if I know a cake will need to be flash-frozen to solidify the icing. Other than that, it was very good, and there was no cake left at the end of the Birthday Break. I had also decided to keep the cupcakes in reserve for anyone who didn’t get a slice of the cake. When I brought the cake into the staff room, there was just no room for both, and it would have looked like I’d tried too hard. But hey, more cupcakes for us!

IMG_1388

Thank you for reading 🙂