I’m pretty sure this is the first time I’ve ever made holiday season cookies so early (we’re not even out of November yet?!)
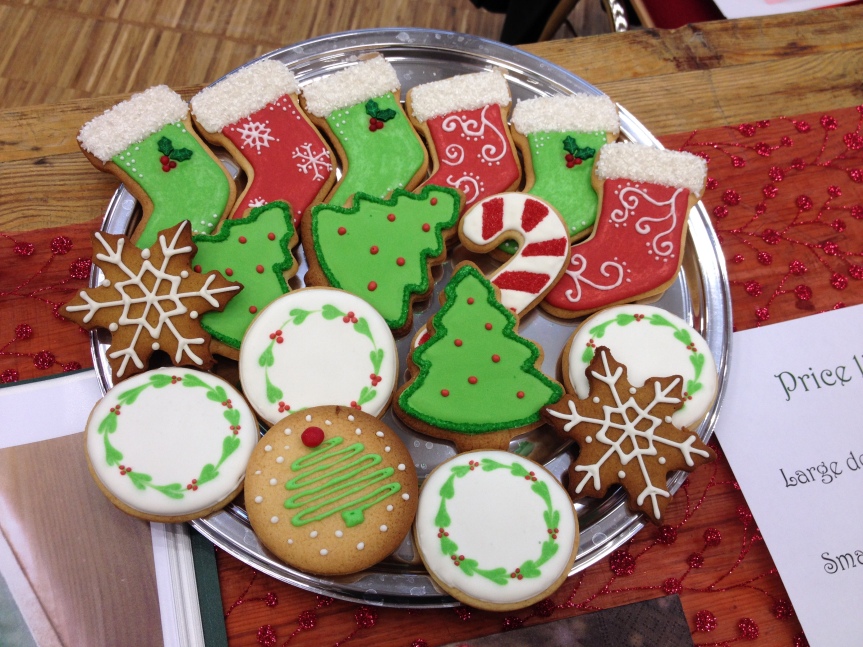
Stay tuned, as I have lots of baking to come in the next month or so, and I’m excited to share it all with you!
Jo x

I’m pretty sure this is the first time I’ve ever made holiday season cookies so early (we’re not even out of November yet?!)
Stay tuned, as I have lots of baking to come in the next month or so, and I’m excited to share it all with you!
Jo x
Hello everyone!
This cake was a very very fun challenge! Months ago, I agreed to bake a cake for a colleague’s 50th birthday. It finally rolled around, and I coordinated with his wife as to flavour and decoration. Chocolate was the obvious choice, and two of his passions are cycling and skiing, so we came up with the idea of a mountain or hill cake, split on one side with a snowscape and a summer scene on the other.
I actually really planned out this cake:

The chocolate cake I used was a chocolate mudcake recipe from a new book I got, Planet Cakes. I’ve heard of mudcakes being used before as good carving cakes, and since I’ve had so much trouble with my Devil’s food cake, I thought I’d try this one out. It was fairly easy to make. I made a double batch, and baked it in three different tins: one wide and shallow (about 10″ I think), two in my regular 8″ tins, and one in half of my Sports Ball cake pan (for the top of the mountain).
My tree idea completely failed and I had to replace them with others (more on that later).


I also made a dark chocolate ganache to help keep the whole cake together. Chopping it was a challenge; luckily, Cooking Hints from Chris helped me out!


The first time I made ganache in the summer, it didn’t set properly. This one did so I was super excited!
Then I started putting the cake together. Mudcake is DEFINITELY easier to carve and stick together using ganache. Ganache solidifies quickly as well, which was great.

I made a winding path going around the hill. Then came the fun part: Making lots of vanilla buttercream icing and tinting it different colours for the real decorating to begin! I started with the summer side of the hill, and put in the dirt path. Piping the grass was strangely relaxing.

View of the cake half-way covered:

Then I made a second batch of vanilla buttercream but made it with 4/5ths vegetable shortening and 1/5th butter. This is because I wanted the snow side to be really white, and not have the yellow tinge that traditional buttercream tends to have.

I crumb-coated the entire snow side first, and added extra white on the path. I wasn’t sure what I would use to make the snow texture different from the path, and thought about using sugar, white sugar sprinkles, and (what would have been ideal) desiccated coconut. But I didn’t have the last one, so I googled some images, and decided that a small star opening on my piping bag would do just fine.
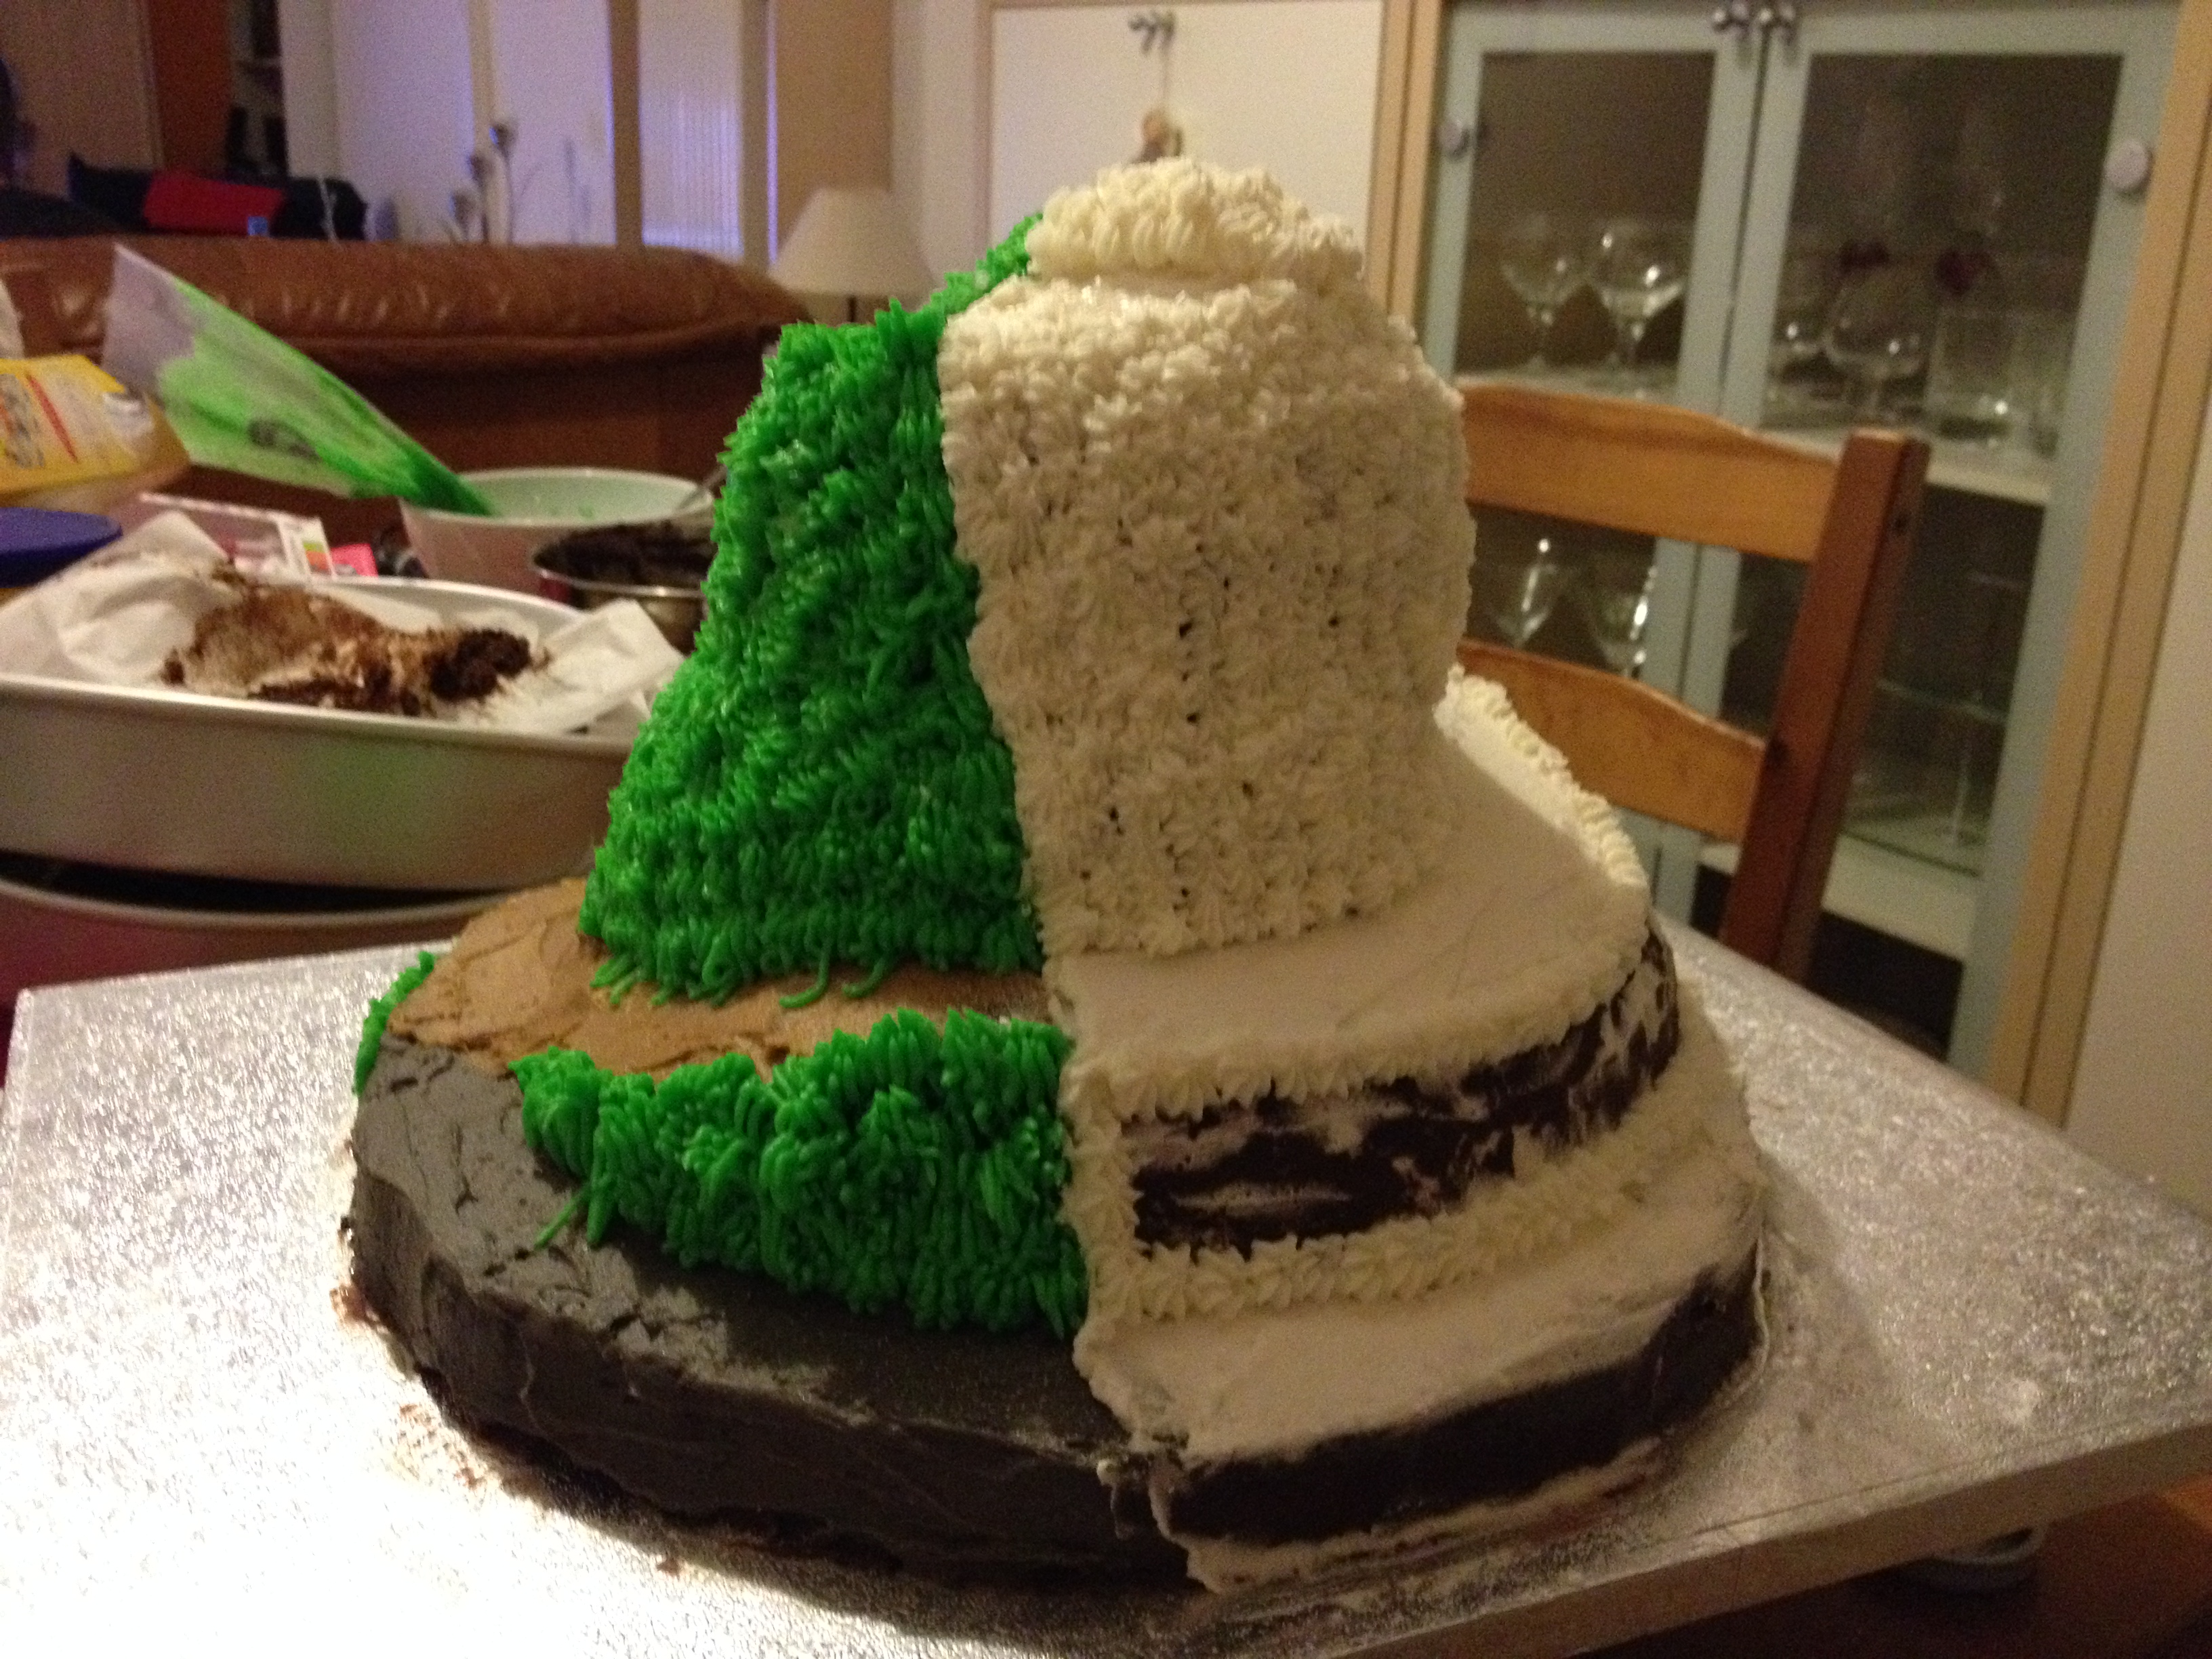
Piping those stars drove me crazy and my hand started hurting. But the effect was looking really cool, so I persevered 🙂
And quite suddenly, I was finished! The pine trees are made of fondant in a soft cone shape, and covered with dark green icing piped with my grass tip. This website helped give me a clue on how to do that.

The next day, when I brought the cake in, my colleague finalized the figurines, which were of a skiier and cyclist, with her husband’s face superimposed.


Overall, I am extremely pleased with how this cake turned out. It was really tough to plan and put together, and my respect for professional cake makes has increased a bit more. I spent six hours putting together this cake, but it was worth every moment.
Until the next time… -Jo
Okay, okay… so Halloween was three days ago. Problem is, I like my scheduled Sunday updates, and I guess that means that if there’s a holiday involved, its related post is going to get delayed by a few days.
Besides, the only really exciting thing here is that I baked super cute Halloween cookies for our Halloween party.
We had some guests over for the week of the holidays, so baking these cookies took about three times the time it should have. My friend Jenna had given me a neat cookie making and decorating book for my birthday last year, with lots of recipes and techniques for using royal icing (of normal consistency and liquid consistency). My brother Keenan also sent me a link a few weeks ago to SugarBelle‘s website, which has a bunch of easy-to-follow cookie decorating tips.
So I was all set.


I used my brand-new Halloween cookie cutters that I got from The Craft Company, and got lots of cookies out of the recipe. I just made a basic vanilla cookie, as that would suit everyone’s tastes.
After the cookies cooled, I mixed up the royal icing.

I had A LOT which was good, because I was going to need several colors. That being said, I still have some plain white left over, even after making a second batch of cookies and decorating those. I read the instructions about royal icing both on SugarBelle’s website (Outlining and Filling Cookies) and in the recipe book, and starting icing the outlines. I started with the ghosts, because there was no color to add to the icing, so I figured they were the easiest to start with.

They were quite easy and I was really pleased with myself.


I also made bats and cats – although getting the black really black for the cat was tough, and I actually ran out, so some of my cats just had outlines. My bats looked pretty cool with outlines and accents too.
I was most pleased with how the pumpkins turned out though.
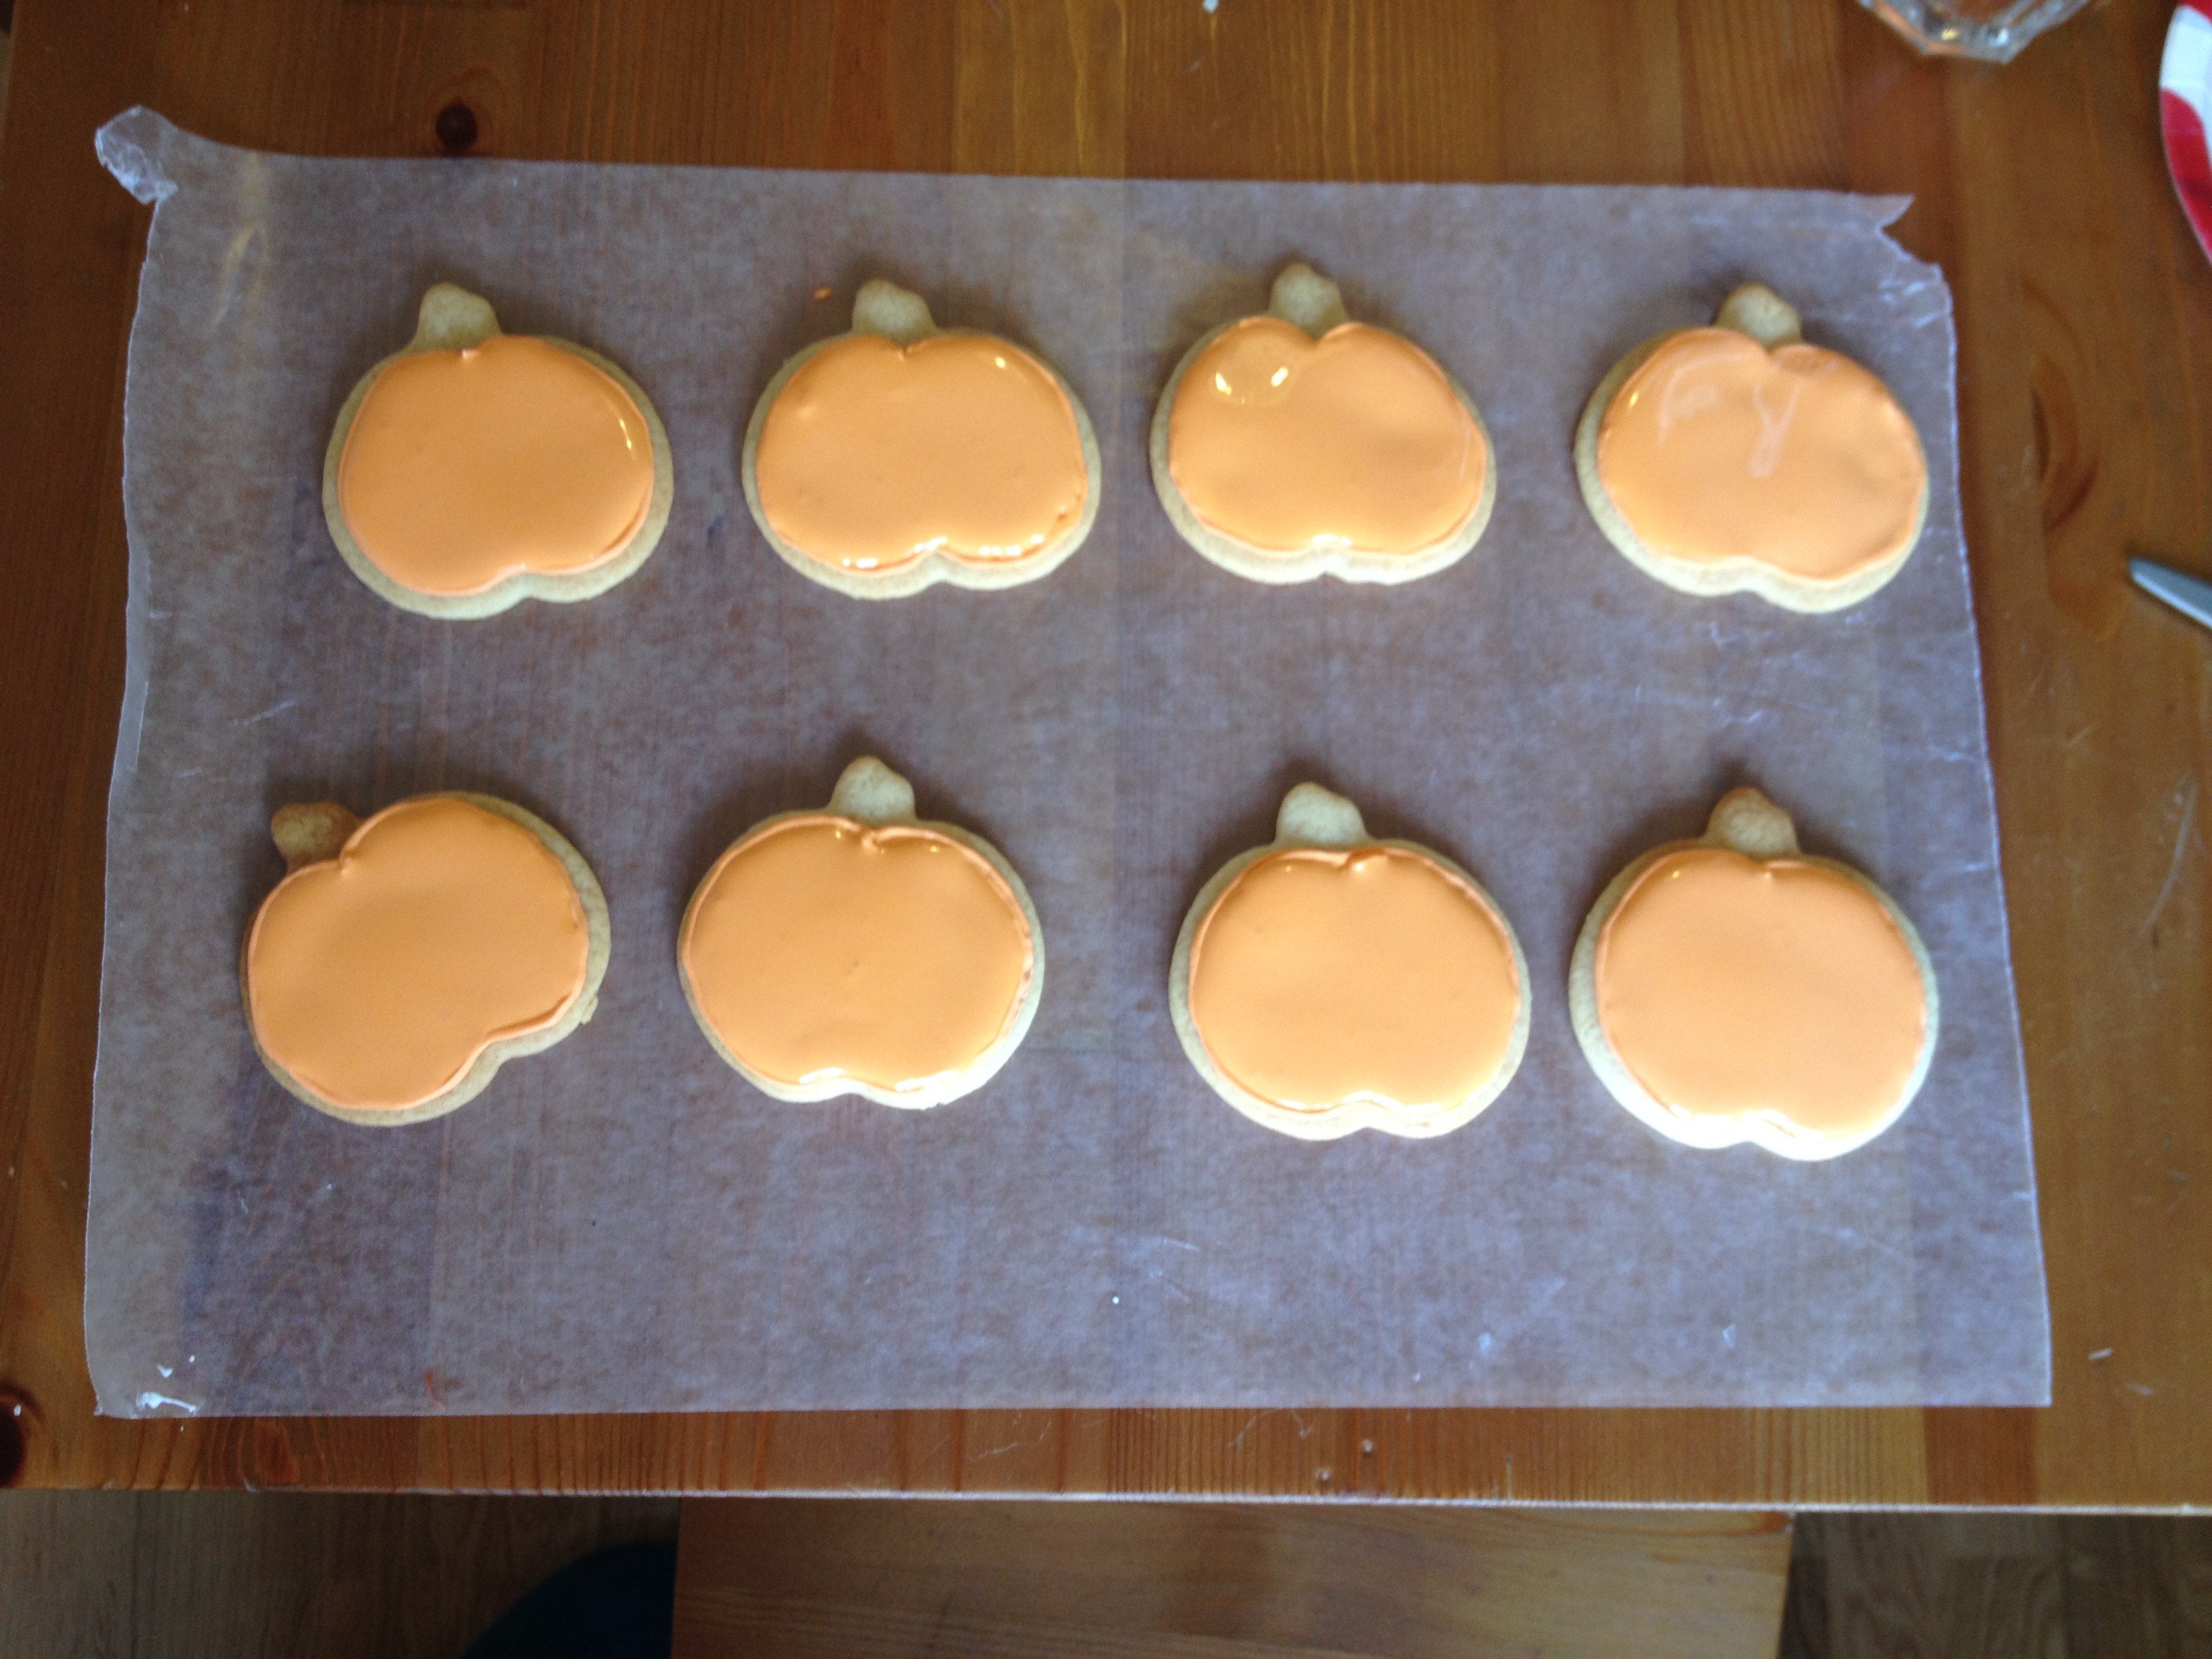

Using royal icing was both tricky and simple. Simple, because there was no fancy opening or tip in the piping bag; I just sniped a tiny piece off at the end, and that was all I needed. The tricky part was diluting the icing to flooding consistency. Beginner’s luck allowed me to get the ghosts’ just right, but I added too much water to the black and purple, which meant they took much longer to dry. As it was, they were taking several hours.
I was pleasantly surprised that, despite the cookies laying out for the icing to dry for hours on end, they didn’t actually go stale at all. Some of these cookies are nearly a week old now, and still taste just as fresh.

I found that decorating these cookies gave me a similar sense of satisfaction as decorating a cake. Of course, a cake is a one-off piece, with lots of smaller decorations coming together, whereas these cookies were four designs repeated many times over.
I had lots of fun, and I look forward to using different cookie recipes, and using my next set of holiday cookie cutters… Christmas is just around the corner!
Thanks for reading!
