Happy Sunday everyone,
First off, apologies for getting this up so late. It’s been one of those days where my brain just did not want to switch on and write up a post. But I owe it to my wonderful readers (YOU) so I hope you enjoy this update.
I had a bit of a break from baking this week (except for a loaf of banana bread yesterday, with some aging bananas!) but thought I would still do a blog post, but on something a little different. I am an absolute sucker for baking accessories, be they themed cupcake wrappers, fondant tools, cupcake toppers (edible and non), food colouring, piping tips, and finding the right kind of cake tin dimensions.
You’ve no doubt seen some of my favourite ‘tools of the trade’ in my overview photos before I get to work. I have to admit, I get all the help I can get when I bake and decorate. I liberally use YouTube videos, browse Google for recipes and decorating ideas, avidly follow bakers and cake decorators on deviantART…
Piping
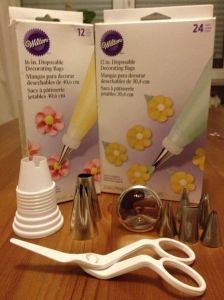
Ever since I discovered how to properly use a piping bag, I’m absolutely mad about them. I love the wide variety of tips you can use to create the simplest and most complex designs. My excitement doubled when I discovered couplers and how to use them.
I generally use Wilton’s disposable piping bags. My reasoning is that, when I’m done, I don’t have the hassle of cleaning them out. They can go straight in the bin. While I know this can be wasteful and not eco-friendly, I find it difficult to wash buttery/greasy tools to begin with, and I don’t own a dishwasher to help me out. To be honest, I have never used a cloth or more permanent material, piping bag, so I can’t objectively compare the two.
When it comes to piping new designs, such as roses, I always refer to YouTube. Chances are, I will find a simple tutorial that shows me how it’s done – and I probably won’t even need the sound on. My other piping tools are the nail and plastic scissors I use when I make buttercream roses.
Adding Colour
I love colour. Adding colour to cake can be tricky though, and I prefer to keep the food colouring to the decorating (unless I’m making a red velvet cake – that’s a different story). I used to use liquid food colours, but a couple years ago, a dear friend gifted me with a set of Wilton food gels (8 colours in a box), and I have been using those to add colour to icing and sugarpaste.
The advantage of using food gels over liquids is that you avoid the risk of turning your icing or fondant more runny or sticky. Gels blend more harmoniously with the icing/fondant. Their colours also tend to be more vibrant, although adding any colour to pure white might take a while.
When I made my soccer-themed cake, I actually used a combination of gel and liquid for the green icing. This was mostly for an aesthetic reason- I wanted a grass green field, not a leaf green, and my gel was leaf green. I had some leftover liquid food colouring which was a darker green, so I added them both to get a lovely field colour.
Sometimes, I use edible ink markers or mix ‘paint’ using food colouring and vodka (it evaporates at room temperature, leaving the colour on the fondant but not affecting consistency) to add detail to a cake.
Fondant
I’m discovering my way around fondant, especially experimenting with making my own rather than relying on the store-bought stuff. I find that making my own, using a marshmallow recipe, yields better taste and texture than store-bought. I have lots of different things to help me work with fondant, although I don’t always use them all. I recently discovered that coating my hands with cornstarch is an excellent way to keep the fondant from sticking to my fingers.

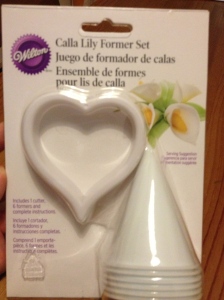
I recently bought this lovely set to help me make Calla lilies, and I can’t wait until I get an opportunity to use it!
Baking Tins & Method
I bake a lot of different types of cakes, of different consistencies, and different shapes. These can sometiems call for using different baking tins or methods. My favourite baking tins are my 9″ round aluminum tins from Wilton. All I need to do is grease them with Crisco (vegetable shortening), dust them with flour, and the cakes will pop out with little to no problem.
When using a loaf pan, I prefer to line it with parchment paper. This is also because it is a non-stick material, which to me, doesn’t actually mean non-stick when using them to bake. I hate having to use a knife to loosen the cake because that can fragilise it.
Cupcakes, obviously, have their own individual papers. I have used silicone moulds for some cupcakes, and they work very well- no need to grease or line them at all. I’m not sure how they would work for larger cakes though.
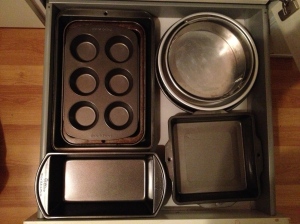
It would be a very long post to write about all the different baking accessories I have to help me along in my decorating. Suffice to show you my storage cupboard:
The box at the bottom contains all kinds of themed cupcake wrappers and decorative papers. I am well-stocked for any festivities coming up! (With another box of stuff from the Craft Company on its’ way!)
So, even if this post was different than my usual ones, I hope you enjoyed having a peek into my supplies and seeing that it cake decorating sometimes just comes down to having the right tools for the right cake.
As always, thanks for reading, and have a great week!


