A Spring Twist: White Chocolate & Raspberry Cake

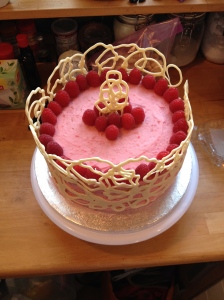
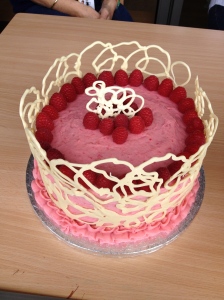
Upon our return from Spring break, we celebrated our final two birthdays of the year. Seeing as I’d made several chocolate cakes before, I gave a twist to this one, and made it with white chocolate instead, and iced it with fresh raspberry buttercream.

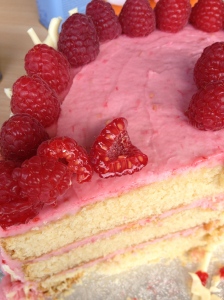
I searched online, as usual, for recipes that would suit my ideas. I used this recipe for the white chocolate cake. It works quite well, although I would urge you to absolutely follow directions and lay down a piece of parchment paper at the bottom of the pan. The cake is quite sticky to get out, and I lost one layer in the process. This meant I had to bake another batch of the recipe, which resulted in the cake having three layers instead of two (which worked out very positively in the end 🙂 ).

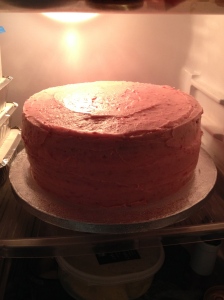
Once baked and cooled, I disregarded their white chocolate frosting, and instead used a delicious, fresh raspberry buttercream recipe instead. When you first add the raspberries to the butter, don’t get discouraged that the mixture looks very sloshy! The icing sugar absorbs it all, and the quantities listed are perfect.

Here is the cake, firming up in the fridge with the buttercream:

IMG_3084

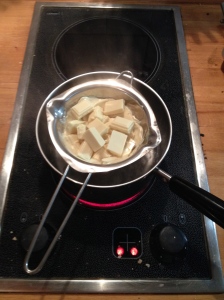
While the cake was setting, I melted a whole bunch of chocolate over a double boiler. I think I melted about 160g. This was to make the beautiful lace collar I planned to place around the cake. For a great tutorial (with pictures!) on how to make one, click here. I love the little pan I used with the pourer bits on each side. I knew I would have to pour the melted chocolate into a piping bag, so that made it much easier and mess-free.

IMG_3083

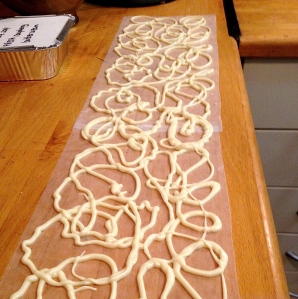
I cut a piece of wax paper in half, and stuck the two ends together to get a long collar. I laid it out on the counter, and once the chocolate was cool enough in the piping bag so I wouldn’t burn my hands, I piped random swirls on the wax paper.

IMG_3085

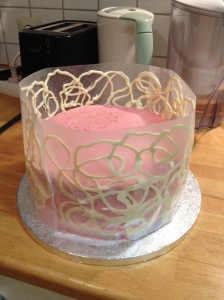
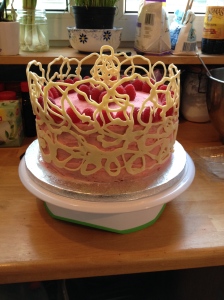
In hindsight, I would cut a slightly smaller hole in the piping bag, as some of these lines are really thick, and it took twice as long for them to set than what the tutorial said (1 hour, instead of 1/2 an hour). But I finally was able to carefully press the collar around the cake.

IMG_3086

Obviously, it was a bit taller than I estimated. I put the cake in the fridge, and left it overnight to set completely.

The next morning, I very very carefully peeled away the wax paper, and added fresh raspberries to spice up the top decoration.

IMG_3088     IMG_3089

Upon taking the wax paper away, I could see that, ideally, I should have placed the chocolate a little lower, so that it would be aligned with the bottom of the cake. But for a first attempt, I was very satisfied with how it turned out.

I didn’t have time that morning before leaving, so I put the leftover buttercream and my piping tools in the bag, and piped an edge around the bottom to hide the gap. My original chocolate centerpiece also cracked, but luckily, I had made several and had a back-up, for when it was time to serve the cake.

IMG_3094

And the inside looked just as delicious 0.O

IMG_3097

Thank you for reading! ^_^

Jo x
 

Decadent Chocolate Roses

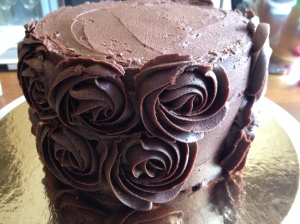
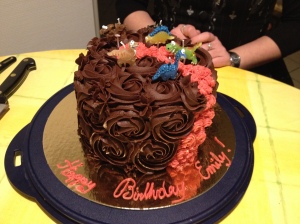
Today’s cake is a rather decadent chocolate layer cake. Months ago, my friend Emily sent me a picture of a cake with large chocolate rose swirls all over it, and I resolved to make it for her birthday. Well, her birthday eventually came around (as birthdays do), and she got her chocolate cake.

The cake itself is a simple cocoa devil’s food cake. which I iced with chocolate buttercream, both between the layers and on the outside. Then I made another batch of buttercream for the large roses.

IMG_2825

To help break up the monotony of constant brown chocolatey-ness, I whipped up a mini batch of vanilla buttercream and colored it pink. I added tiny swirls of pink ‘flowers’ to complement the brown.

IMG_2831

And of course, I got to practice my piping writing. Although I did forget to cross the ‘t’ in birthday! O.O

Sorry this was a bit of a short post this time around – I didn’t take many pictures of this cake, and it was a fairly simple confection.

Thanks for reading,

Jo x


Birthday Boardgame Bonanza

Hello everyone!

Apologies for my absence. Things got very very busy and it was hard to find time to sit down and write a proper post. Of course, that means there is a lot to catch up on! So without further ado…

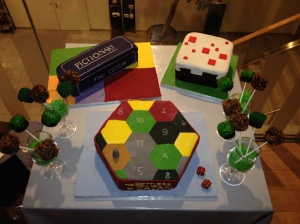
I made three cakes for Zak’s Boardgames Birthday Bonanza. The lesson I learned? How to appropriately size cakes for a given number of people. There was WAY TOO MUCH cake (wait, is that even possible?).

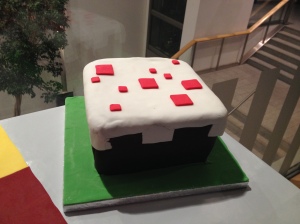
Given his recent foray into Minecraft, the first cake I decided to make him was a cake that looks the way cake does in Minecraft.

IMG_2670

This was a chocolate cake with chocolate buttercream icing. I genuinely looked up a picture of a Minecraft cake in Google so I could place the red sprinkles accurately. This was a relatively simple cake, although cutting and placing the white fondant was tricky. It was fun, although some people at the party were confused about it.

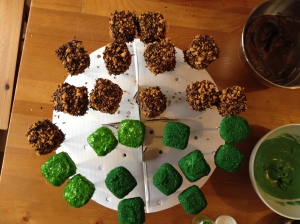
I also made Minecraft cake pops: chocolate of course, and made to look like blocks of dirt or with mine-able materials.

IMG_2657

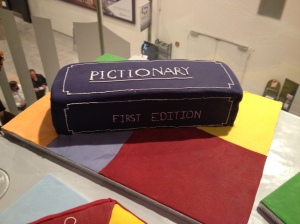
The second cake I made, was of Zak’s favorite boardgame of all time: Pictionary.

IMG_2669

This one was purely vanilla: cake and buttercream icing. Again, a simple design, covered in fondant. I got to use my brand-new writing tips to pipe the white outlines and words. While you can’t tell in this picture, my writing is still a bit wobbly. To help make the lines straight, I used a piping lace decorating tip from SweetSugarBelle “Piping Lace on Cookies” (A side note: I’m really excited to try piping lace too!).

Also, the reason the colors are a bit off on the board, it’s because it’s hard to cut a rectangular board into five equal areas, and I had very little orange/purple-blue fondant to work with. Covering the cake boards was a rather last-minute idea.

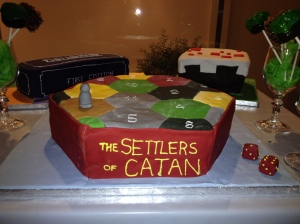
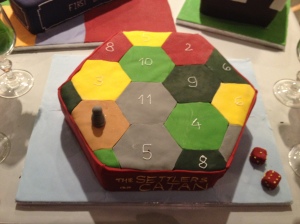
The final cake I made, was based on the Settlers of Catan. I ordered a hexagon-shaped cake pan and had to make four times my regular vanilla cake recipe. I put chocolate buttercream between the layers. I covered the whole thing in fondant, hexagons the exact size of the game pieces. I made my own Robber. I even made dice! I’m pretty darned proud of this cake.

IMG_2671  IMG_2672

To help with the placing of the resources, I generated a game on my iPad version, for complete authenticity. Although the cake isn’t big enough to show the full game, the resources are placed randomly, as are the numbers.

So, three cakes, when really, the Catan cake would have fed us all.

IMG_2675

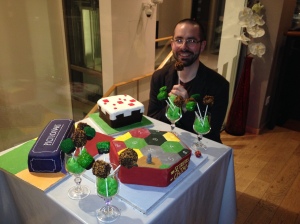
So the birthday boy was very happy, and I was pleased to pull this off, even if I do need to seriously reconsider cake quantities etc.

IMG_2678

Thanks for reading!

Jo

PS. I know this post isn’t as detailed as to the making-of for each cake, but I thought it would simply be too long, and I didn’t like the idea of splitting it into three posts. Suffice to say there was a lot of work involved but I’m pleased with how they all turned out ^_^