Chocolate Bouquet

This cake is for chocolate lovers. It was my third epic cake in two weeks, and I don’t think I will ever get myself into that situation again unless I am a full-time baker. Jenna requested a chocolate cake, and I had to top the one I made for her last year, which was modeled to look like a box of chocolates (tutorial by Gina on deviantART).

After a Google search, I came across this image, and thought it good inspiration for my own cake. Unfortunately, my cake pan was wider than this, and I couldn’t find chocolate fingers to make the “basket” so I simply used chocolate fondant.

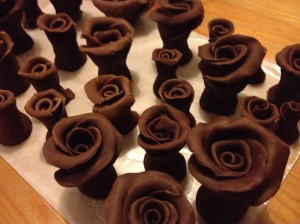
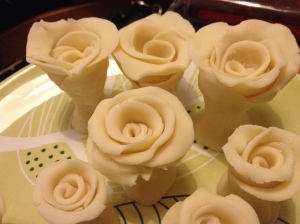
First, I looked up how to make chocolate roses. I made three batches of chocolate “plastic” (I don’t like that term), one in white, milk, and dark. This recipe was easy to follow and worked very well, but make sure you use cooking chocolate, not eating chocolate. I couldn’t find cooking chocolate for the milk and used Cote D’Or, which ended up crumbling easily when I made the roses. Then, I followed this step by step tutorial on how to form the roses.

IMG_2421     IMG_2422

It was very similar to forming fondant roses, but the chocolate hardens with exposure to the air, rather than softens after more manipulation, the way fondant does. It was easier to form the waves in the petals and curl them back because they were simultaneously hardening. With fondant, I find it is hard to get the thinness needed because it tears, and just falls off.

IMG_2424

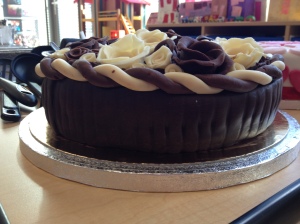
I made three different size roses, and started placing them on the chocolate buttercream covered cake. It was a mostly random arrangement, with a lot of tiny roses to intersperse the larger ones.

IMG_2426

As I got closer to the edge, I realized I needed to place something to help tie the bouquet together. So I rolled out a long snake of dark and white chocolate plastic and twisted them together to make a border. Then I continued filling in the space as much as possible.

IMG_2438     IMG_2437

Jenna was super pleased with the cake, and I’m quite happy with how it turned out. In the future though, I know I need to prep A LOT more tiny roses than I did initially. Covering an 8″ cake takes a lot of roses and a lot of patience.

Thanks for reading ^_^

Pink & Purple Ombre

This will just be a short post, and nowhere near as elaborate as my last one, but I want to share this cake with you anyway. It brought me to tears, despite its’ simplicity.

I made a pink and purple ombre cake for my colleague’s birthday this week, right after my mountain cake. I drew inspiration from Glorious Treats’ Purple Ombre Mini Cakes, and figured it would be an easy and simple cake that would still look pretty.

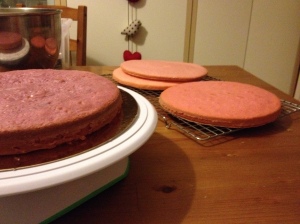
And it mostly was! I doubled my easy vanilla cake recipe and split it first in half. That was my first mistake: I eyeballed instead of measured. With each half, I then dyed it with the lighter colour first, and then the darker. Overall, my colours were just fine… but the heights of my cakes definitely were not.

IMG_2390

I admit: I cried a bit. I had a mountain of stress, a huge cake I’d finished the day before, and now this simple cake reduced me to tears. But, I still put it together, because honestly, what else was I going to do?

It actually turned out OK.

IMG_2392

Unfortunately, the skinniest layer was supposed to be the second, so the ombre effect was a bit off, but the cake overall looked good.

I covered it with simple vanilla buttercream roses.

IMG_2393

And the cut slice still looked pretty cool ^_^

IMG_2399

But for next time, lesson learned: Don’t double from the start, and measure accurately when separating the batter.

PS. Apologies for the darkness in the photos. I don’t have very good photo lighting in the apartment, and it was dark outside.

Summer & Winter Sports

Hello everyone!

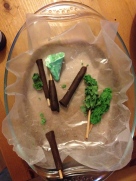
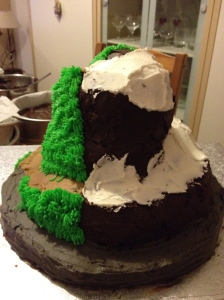
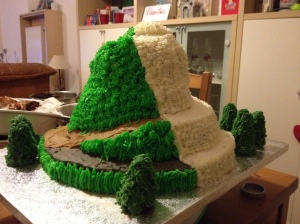
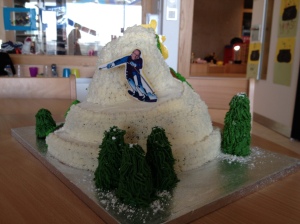
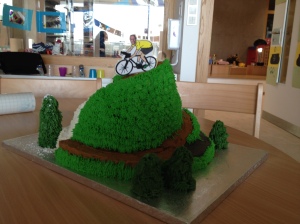
This cake was a very very fun challenge! Months ago, I agreed to bake a cake for a colleague’s 50th birthday. It finally rolled around, and I coordinated with his wife as to flavour and decoration. Chocolate was the obvious choice, and two of his passions are cycling and skiing, so we came up with the idea of a mountain or hill cake, split on one side with a snowscape and a summer scene on the other.

I actually really planned out this cake:

IMG_2387

The chocolate cake I used was a chocolate mudcake recipe from a new book I got, Planet Cakes. I’ve heard of mudcakes being used before as good carving cakes, and since I’ve had so much trouble with my Devil’s food cake, I thought I’d try this one out. It was fairly easy to make. I made a double batch, and baked it in three different tins: one wide and shallow (about 10″ I think), two in my regular 8″ tins, and one in half of my Sports Ball cake pan (for the top of the mountain).

My tree idea completely failed and I had to replace them with others (more on that later).

IMG_2384     IMG_2385

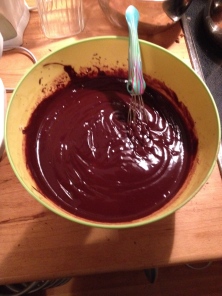
I also made a dark chocolate ganache to help keep the whole cake together. Chopping it was a challenge; luckily, Cooking Hints from Chris helped me out!

IMG_2355     IMG_2357

The first time I made ganache in the summer, it didn’t set properly. This one did so I was super excited!

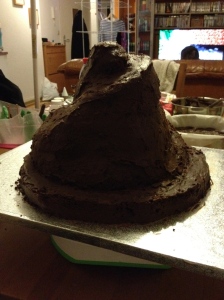
Then I started putting the cake together. Mudcake is DEFINITELY easier to carve and stick together using ganache. Ganache solidifies quickly as well, which was great.

IMG_2358

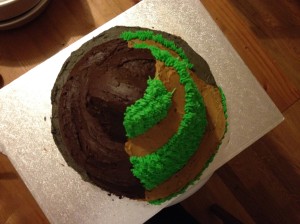
I made a winding path going around the hill. Then came the fun part: Making lots of vanilla buttercream icing and tinting it different colours for the real decorating to begin! I started with the summer side of the hill, and put in the dirt path. Piping the grass was strangely relaxing.

IMG_2362

View of the cake half-way covered:

IMG_2366

Then I made a second batch of vanilla buttercream but made it with 4/5ths vegetable shortening and 1/5th butter. This is because I wanted the snow side to be really white, and not have the yellow tinge that traditional buttercream tends to have.

IMG_2368

I crumb-coated the entire snow side first, and added extra white on the path. I wasn’t sure what I would use to make the snow texture different from the path, and thought about using sugar, white sugar sprinkles, and (what would have been ideal) desiccated coconut. But I didn’t have the last one, so I googled some images, and decided that a small star opening on my piping bag would do just fine.

IMG_2372

Piping those stars drove me crazy and my hand started hurting. But the effect was looking really cool, so I persevered 🙂

And quite suddenly, I was finished! The pine trees are made of fondant in a soft cone shape, and covered with dark green icing piped with my grass tip. This website helped give me a clue on how to do that.

IMG_2377

The next day, when I brought the cake in, my colleague finalized the figurines, which were of a skiier and cyclist, with her husband’s face superimposed.

IMG_2381     IMG_2382

Overall, I am extremely pleased with how this cake turned out. It was really tough to plan and put together, and my respect for professional cake makes has increased a bit more. I spent six hours putting together this cake, but it was worth every moment.

Until the next time… -Jo